Houseplant troubleshooting
How to identify and remove mealybugs on houseplants
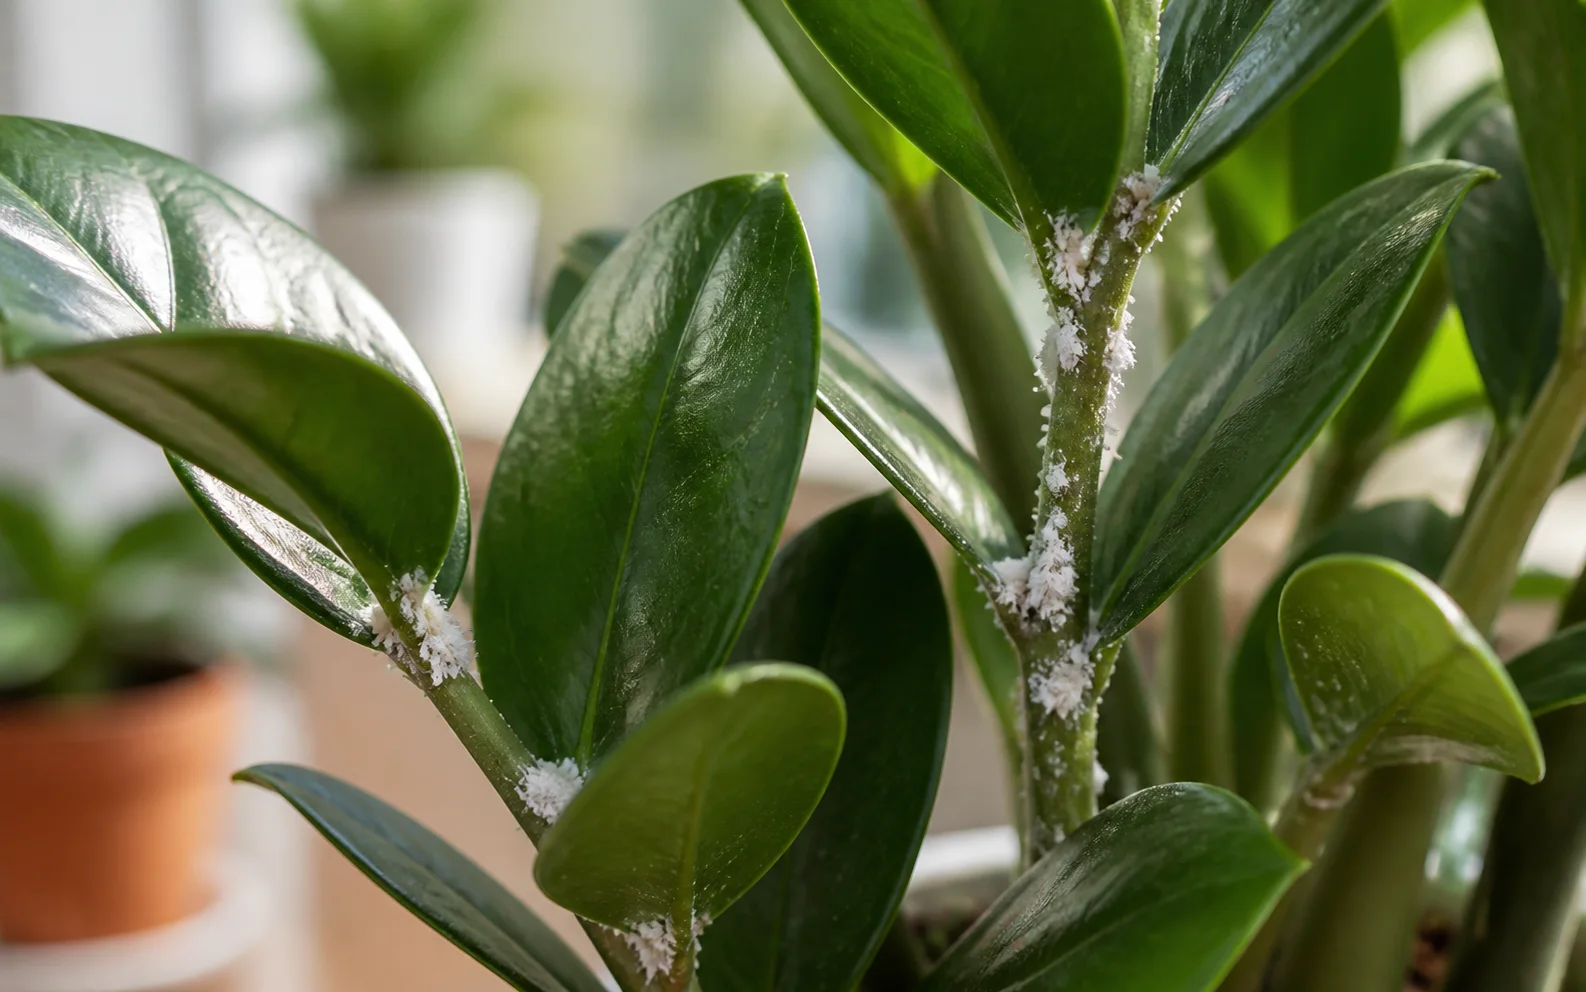
Mealybugs look like small white cottony clusters in leaf joints, on stems, and around new growth. Control starts with isolation, close inspection, manual removal, and repeated follow-up checks.
What You May See
Look at the whole plant before deciding on a fix. The age of the affected leaves, whether the soil is wet or dry, and how quickly the symptom appeared all help separate normal adjustment from an active care problem.
- White cottony clusters in leaf joints or stem nodes
- Sticky residue on leaves or nearby surfaces
- Distorted new growth
- Slow decline despite normal watering
Visual Checks
Compare this symptom image with the affected leaves, roots, soil surface, or growth pattern on your plant. Use it as a visual reference, then confirm the cause with the checks below before changing care.
Mealybugs exampleUse this as the main visual reference for the symptom pattern.
Likely Causes
Match the symptom to the plant's recent care history. The same leaf problem can come from different causes, especially when light, soil moisture, temperature, repotting, and fertilizer changed around the same time.
First Checks
Do these checks before buying treatments or repotting. A few minutes of inspection can prevent the common mistake of watering a plant with damaged roots, fertilizing a stressed plant, or moving a low-light plant straight into harsh sun.
- Isolate the plant before inspecting nearby plants.
- Check stem nodes, undersides, new growth, and pot rims.
- Look for sticky honeydew, white residue, and distorted tips.
- Inspect plants that were touching or sitting close to the affected plant.
What To Do Next
Choose the step that matches what you confirmed. If more than one cause seems possible, start with the least disruptive correction and watch new growth, root condition, and drying time for signs of recovery.
- Remove visible mealybugs with a cotton swab or targeted wipe.
- Prune badly infested tender growth when it will not recover.
- Repeat treatment and inspection every few days until no new clusters appear.
- Clean the shelf, pot exterior, and nearby plant surfaces.
What To Avoid
- Do not treat once and return the plant to a crowded shelf immediately.
- Do not ignore leaf joints and hidden stem crevices.
- Do not use harsh products on sensitive plants without checking label safety.