Houseplant troubleshooting
How to spot spider mites before they spread
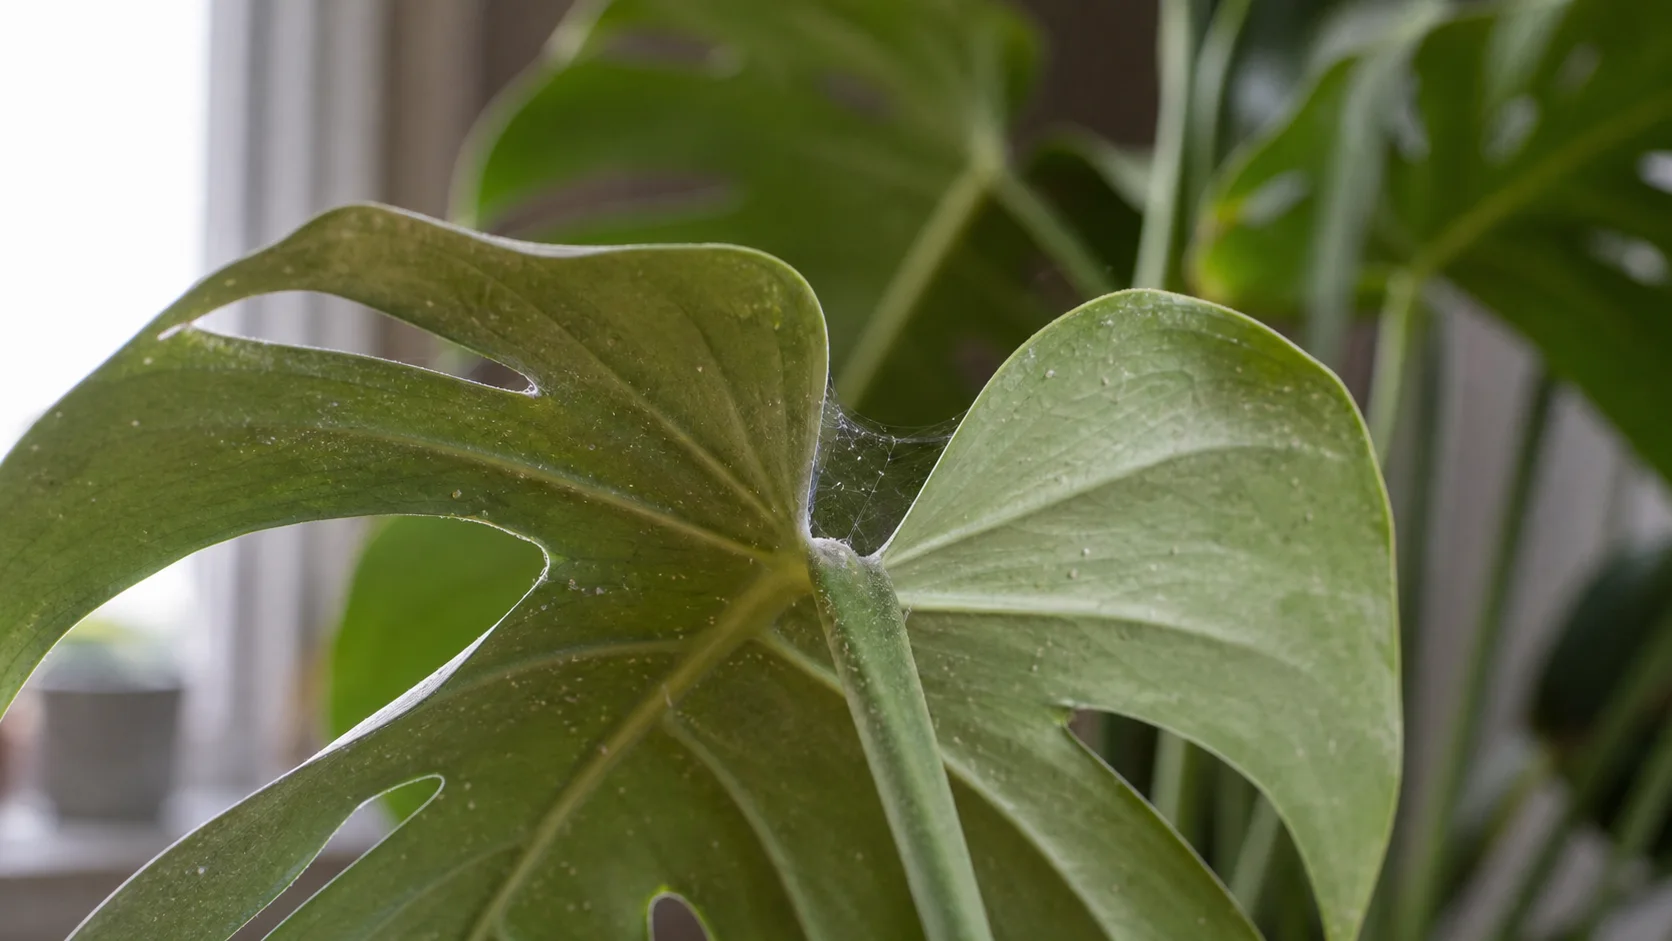
Spider mites are easier to control when caught early. Look for fine webbing, stippled leaves, dusty undersides, and decline on plants kept warm and dry.
What You May See
Look at the whole plant before deciding on a fix. The age of the affected leaves, whether the soil is wet or dry, and how quickly the symptom appeared all help separate normal adjustment from an active care problem.
- Fine webbing near leaf joints
- Tiny moving specks on leaf undersides
- Pale stippling or speckled leaves
- Crispy decline in warm dry rooms
Visual Checks
Compare this symptom image with the affected leaves, roots, soil surface, or growth pattern on your plant. Use it as a visual reference, then confirm the cause with the checks below before changing care.
Spider Mites exampleUse this as the main visual reference for the symptom pattern.
Likely Causes
Match the symptom to the plant's recent care history. The same leaf problem can come from different causes, especially when light, soil moisture, temperature, repotting, and fertilizer changed around the same time.
First Checks
Do these checks before buying treatments or repotting. A few minutes of inspection can prevent the common mistake of watering a plant with damaged roots, fertilizing a stressed plant, or moving a low-light plant straight into harsh sun.
- Inspect undersides with bright light.
- Wipe a white paper towel under leaves and look for streaks or specks.
- Check nearby plants, especially thin-leaved tropicals.
- Separate the affected plant before treatment.
What To Do Next
Choose the step that matches what you confirmed. If more than one cause seems possible, start with the least disruptive correction and watch new growth, root condition, and drying time for signs of recovery.
- Rinse foliage thoroughly, including undersides.
- Remove badly damaged leaves.
- Repeat treatment on a schedule because eggs can hatch later.
- Improve inspection habits for nearby plants.
What To Avoid
- Do not treat once and assume the problem is gone.
- Do not leave infected plants touching others.
- Do not rely on misting as pest control.